Project Overview
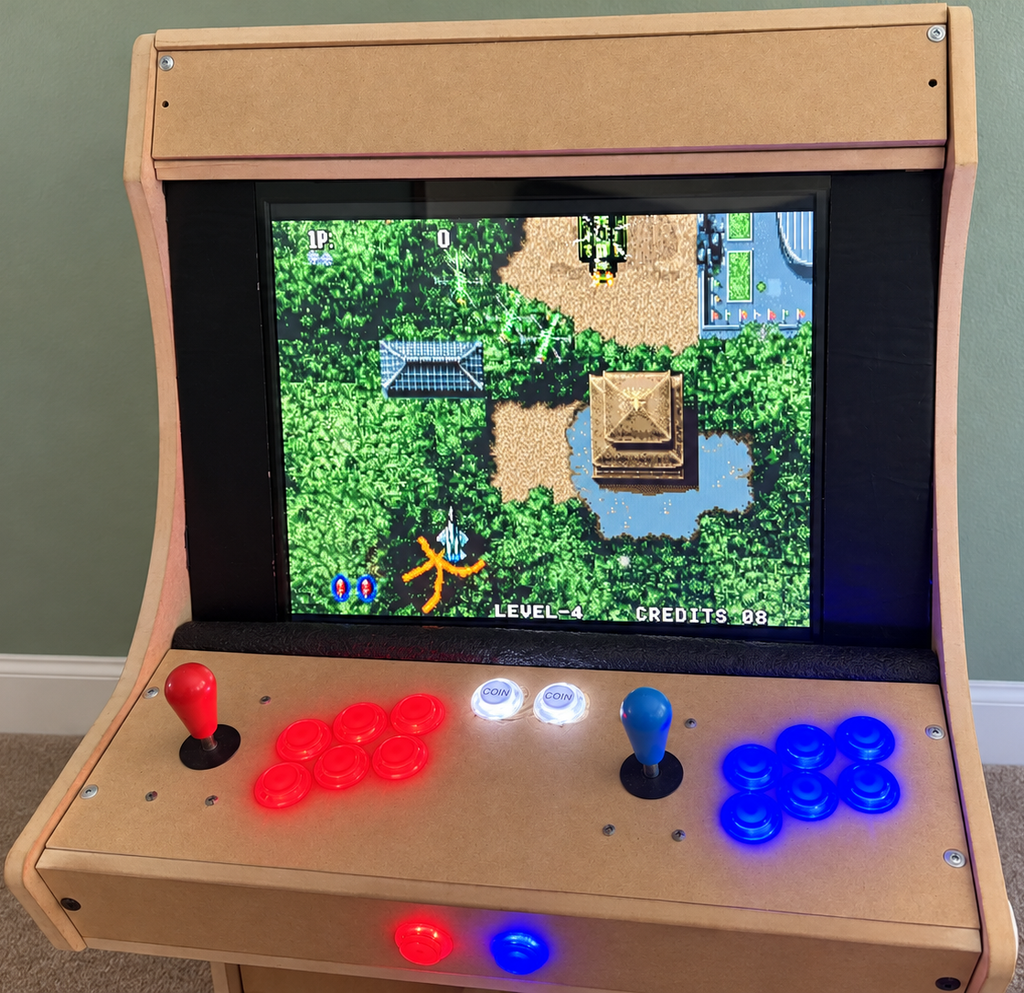
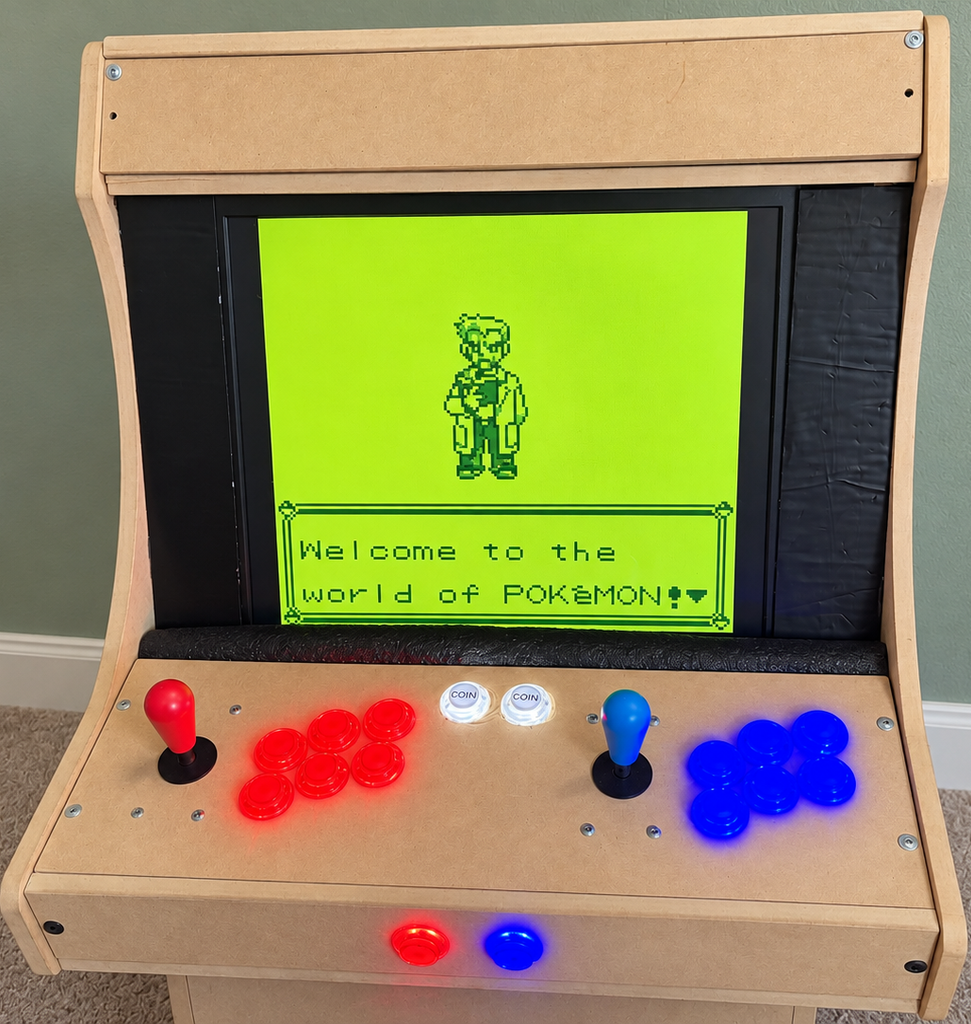
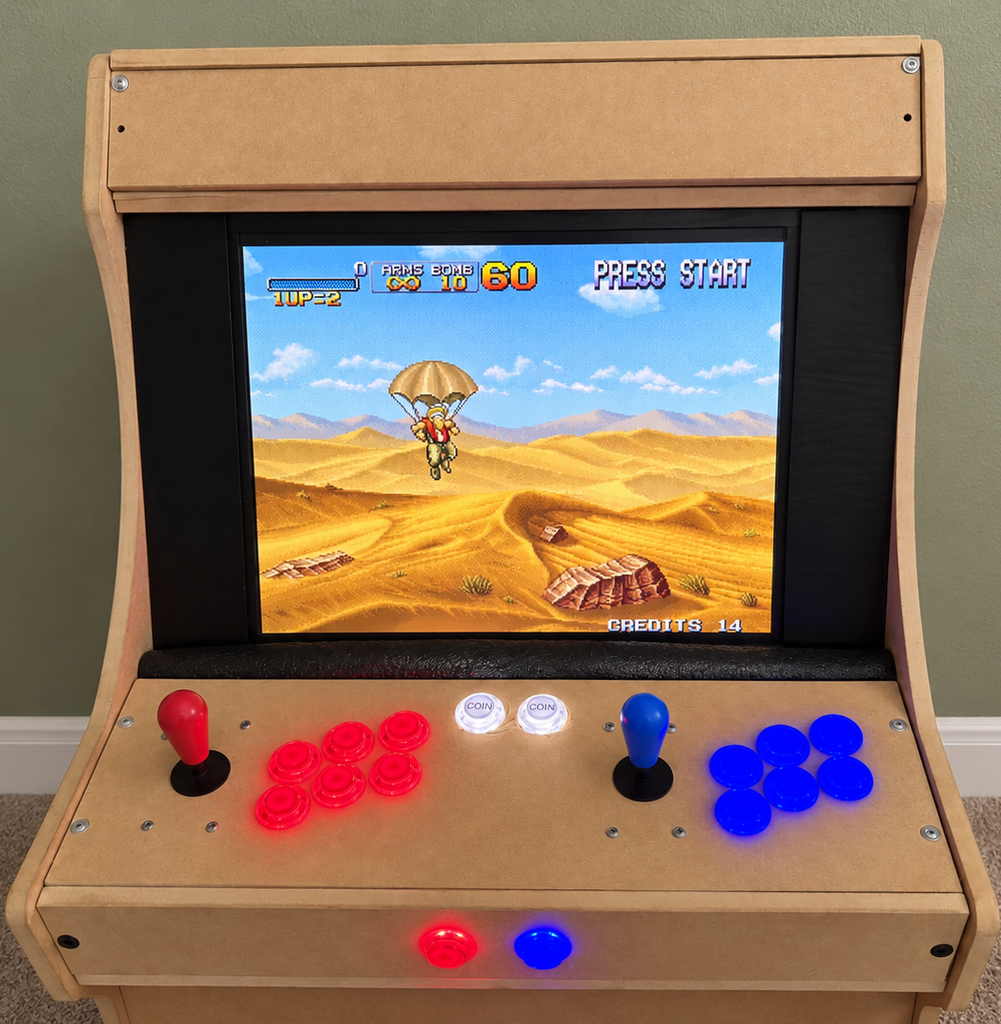
RetroPi is a Raspberry Pi-powered arcade cabinet I built to bring classic console and arcade games into a dedicated, two-player setup. The project combined physical hardware, arcade controls, system configuration, game emulation, storage, and interface customization into one complete build. Along the way, I worked through compatibility, controller configuration, display settings, and other technical issues to create a system that was simple to use and capable of running games from multiple generations.
Why I built it
Some of my earliest memories of arcade games came from traveling with my parents and brother to his hockey games. The rinks and other places we visited often had arcade machines, and at first they were simply something to do while I waited. Over time, though, they became something I genuinely looked forward to. I would return to the same games, try to beat my previous high scores, and probably spend far more quarters than I would ever want to total up.
Those arcade machines became a memorable part of my childhood, and that interest never really went away. Building RetroPi gave me a way to recreate some of that experience for myself while also turning it into a hands-on technical project. Instead of simply running old games through an emulator on a computer, I wanted something physical—a dedicated cabinet with real controls, two-player support, and the feeling of walking up to an arcade machine and immediately starting a game.
RetroPi is also something I see as a starting point rather than the end of the idea. Eventually, I would like to build a full-size stand-up arcade cabinet that is as authentic as possible, including a working coin mechanism. Ideally, it would accept real quarters and return them internally so the same coin could be reused, preserving the experience of inserting a quarter without actually charging anyone to play. I would also like to build additional tabletop arcade systems and continue experimenting with different retro-gaming hardware.
For me, the project combines nostalgia with the kind of hands-on work I enjoy most: hardware, system configuration, troubleshooting, customization, and turning an idea into something tangible.
Technical Breakdown
Behind the arcade cabinet is a complete Raspberry Pi-based system combining computing hardware, arcade controls, display hardware, storage, emulation software, and a custom interface. Building RetroPi required both physical assembly and software configuration to make the cabinet behave like a dedicated arcade system rather than simply a computer running emulators.
Hardware
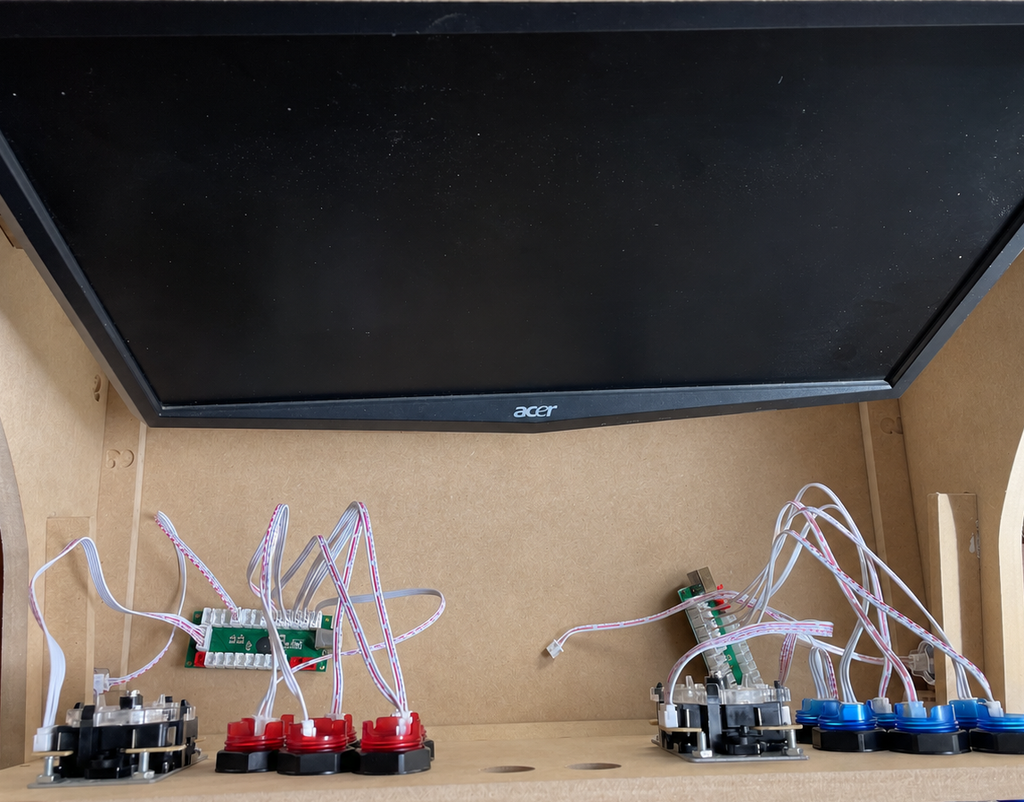
The cabinet required more individual hardware components than its size might suggest. Along with the Raspberry Pi itself, the build included separate control boards for the buttons and joysticks, a 20-inch display, speakers, a 256 GB SanDisk storage device, power components, cabling, and the connections needed to tie everything together.
Before assembly, I had to make sure each component was compatible, physically fit within the cabinet, and could be positioned in a way that kept the system organized and serviceable. The 20-inch monitor was chosen deliberately because its proportions worked better with older games than a typical modern widescreen display, helping reduce the unused black space that appeared with classic aspect ratios. Although the enclosure had enough room for everything, fitting and routing multiple pieces of hardware into a compact space was still an important part of planning the build.
Cabinet
The cabinet itself was made up of roughly 18–20 individual pieces, each cut to different dimensions and assembled into the final tabletop form. The instructions were straightforward, but I still spent additional time preparing each piece before assembly. I sanded the surfaces and edges to make sure they were smooth, paying particular attention to the areas where a player’s hands and arms would rest during use. I also tried to keep the finished cabinet relatively lightweight so it could be moved without sacrificing stability.
Software
Batocera served as the operating system and front end for the arcade cabinet. I configured the system for network access, initially using Ethernet while building the game library and later switching to Wi-Fi once the Raspberry Pi was installed in the cabinet. Files, artwork, and other resources could be transferred across the network, which made managing the system much easier without having to repeatedly remove the storage device.
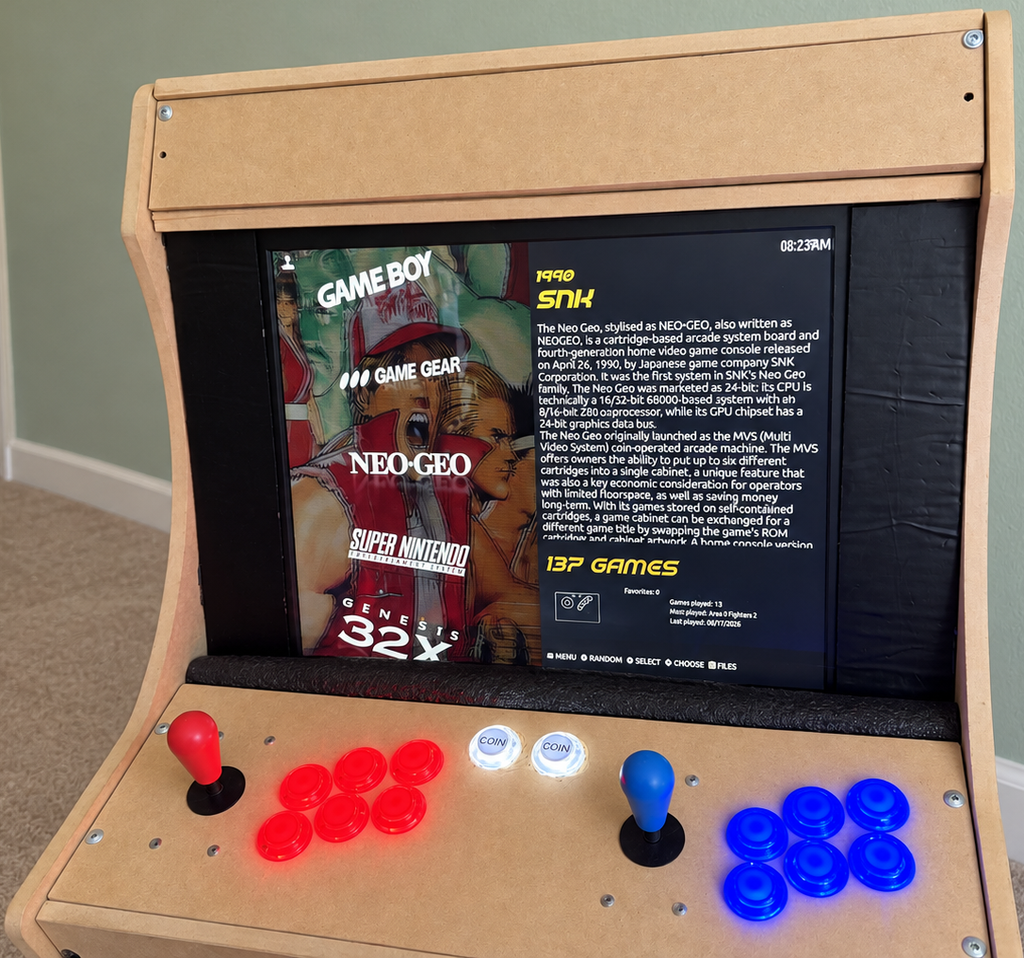
I also customized the Batocera interface with different themes and spent considerable time organizing the game library and metadata. I originally added artwork manually, but after completing roughly three-quarters of the library, I discovered Batocera’s automated scraping tools and rebuilt the artwork collection so everything would remain consistent. I also manually cleaned up game titles and metadata, removing unnecessary brackets, parentheses, and other naming artifacts to give the interface a more polished appearance.
Emulation
The cabinet was configured to support games from a wide range of arcade and home-console systems. Although I generally kept the individual emulators close to their default settings, some platforms required additional configuration before they would function correctly. Certain systems, including Neo Geo, required specific BIOS files, which meant identifying missing dependencies and troubleshooting games that would otherwise fail to launch.
Display compatibility was another consideration. Modern widescreen monitors left unused space on either side of many older games because their original aspect ratios were much narrower. I ultimately chose a 20-inch monitor whose proportions were better suited to classic games, allowing the image to fill the available display area much more naturally without the large black borders I was seeing on a typical 24-inch widescreen monitor.
Controls
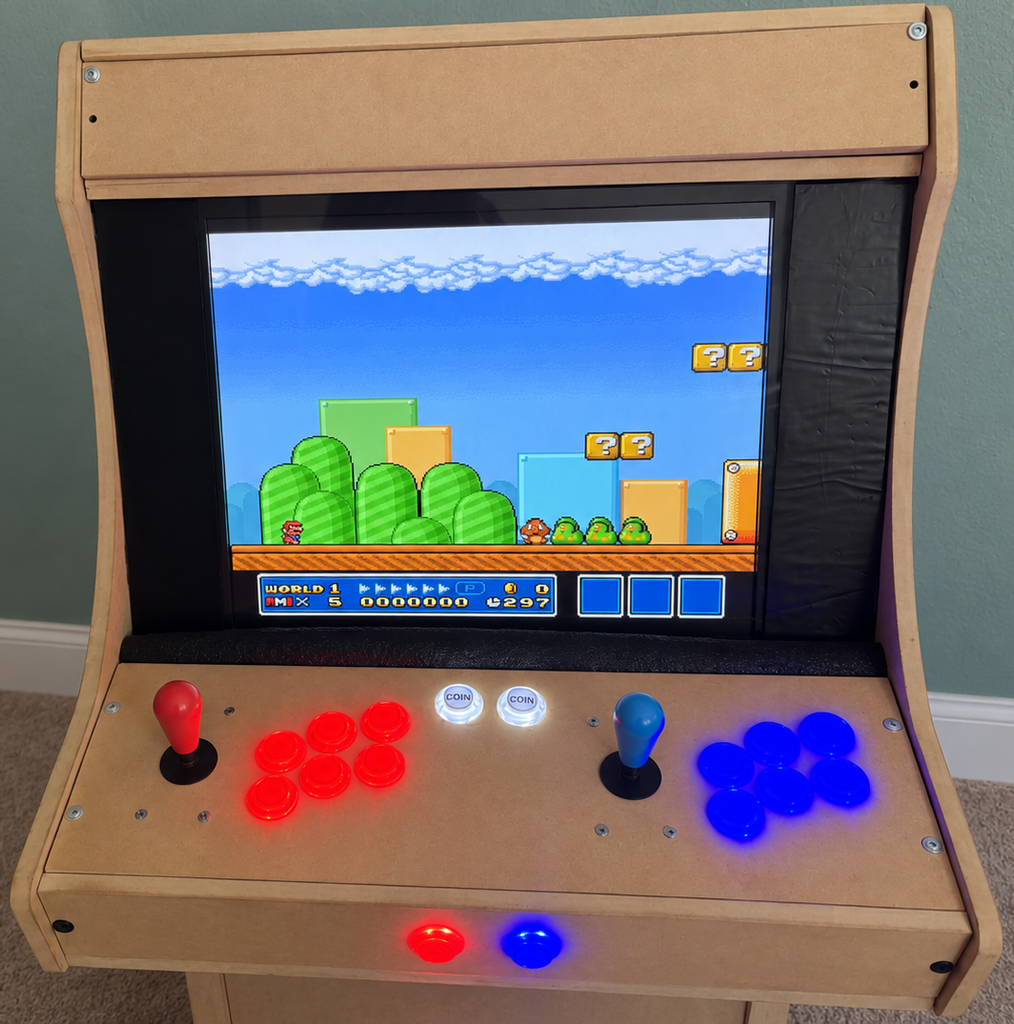
The cabinet used a six-button layout for each player, which required mapping a modern-style control scheme onto traditional arcade hardware. The primary four buttons were configured as A, B, X, and Y, while the remaining two buttons were assigned as Left and Right shoulder inputs. Dedicated Coin buttons were also included for arcade titles that expect a coin or credit input.
Additional buttons were positioned within easy reach of each player for quick-access functions such as pausing, while a separate button on the front of the cabinet was used as an administrative hotkey. Batocera allowed combinations of these buttons to perform system-level actions; for example, pressing the player-side hotkey together with the administrative button could exit the current game and return directly to the main menu. This allowed the cabinet to be operated almost entirely from the arcade controls without requiring a keyboard.
Looking back, I would probably design the control layout differently if I built the cabinet again. The enclosure dictated the number and placement of the buttons, so part of the project involved making the most practical control scheme possible within those physical limitations.
Two-Player Setup
A two-player layout was something I wanted from the beginning because most of the arcade machines I remembered using were designed to be shared. Even though a tabletop cabinet naturally gives each player less space than a full-size machine, the ability to sit side by side and play multiplayer games was an important part of recreating the arcade experience.
I also wanted the two sides to feel visually distinct, which led to the red-versus-blue design of the controls. Each player has their own joystick and button set, with the contrasting colors making it immediately clear which controls belong to Player 1 and Player 2. The result gave the cabinet more personality while still keeping the layout simple and intuitive for multiplayer games.
Challenges
The build presented challenges on both the software and hardware sides. One of the biggest was getting Batocera to behave the way I originally envisioned. Some of the system files and game libraries I acquired were not organized correctly or did not work with the expected emulator, which meant spending a considerable amount of time researching different options, testing them, and determining which configurations worked best.
Customizing the interface also took more trial and error than expected. I wanted the system selection screen to have a clean, text-based appearance rather than relying heavily on console images, so finding a Batocera theme that matched that vision required testing several different designs before settling on one that felt right.
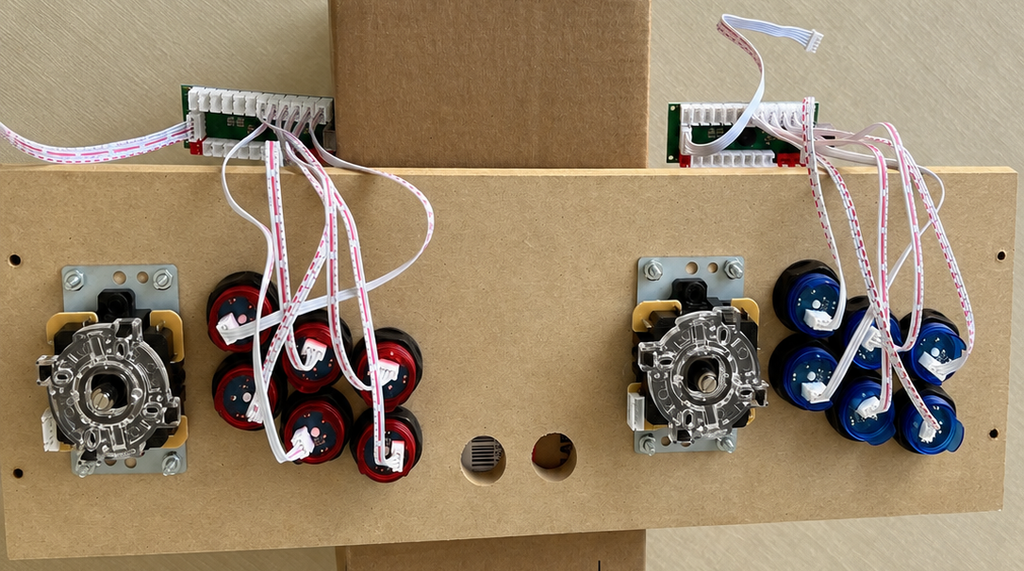
There were also physical challenges during assembly. Some of the pre-cut button openings were too small for the hardware I was using and had to be carefully enlarged before the controls could be installed. Cable length limited where certain control boards could be mounted, and network connectivity occasionally became another obstacle when the Raspberry Pi did not have a strong enough connection for file transfers or online features.
Despite those setbacks, the project was enjoyable enough that I would absolutely build another one. Most of the difficulties became lessons I could apply to a future cabinet, allowing me to plan around the problems I encountered while keeping the parts of the build that worked well.
Troubleshooting
Troubleshooting the cabinet became a combination of research, measurement, experimentation, and trial and error. When something did not work the way I expected, I tried to understand why rather than immediately replacing it. For example, researching how older games were originally displayed helped me determine that a 20-inch monitor was a better fit for the cabinet and the aspect ratios I wanted. I also used spare hardware, physical measurements, and repeated testing to verify that components would fit and function correctly before committing to a final configuration.
Some problems required physical modifications. When the pre-cut openings in the cabinet were too small for the arcade buttons, I measured the required diameter and purchased the appropriate drill bit so I could carefully enlarge the openings myself. That experience reinforced that a premade kit did not necessarily mean every component would fit perfectly and that making controlled modifications was sometimes necessary to get the result I wanted.
The software side required the same kind of investigation. I spent time learning where Batocera stored different settings, testing configuration changes, and trying to understand the cause of unexpected behavior rather than simply working around it. Some issues were not obvious—for example, background music within the interface appeared harmless but was consuming enough resources to affect performance. Once I isolated that feature and disabled it, the system ran noticeably smoother. Problems involving audio, networking, emulation, and interface behavior were handled in a similar way: identify the symptoms, research possible causes, change one variable at a time, and test the result.
What I learned
This project taught me that building a reliable system is rarely about getting every decision right the first time. A large part of the process was learning how to research unfamiliar problems, test different approaches, and make adjustments as new issues appeared. Whether I was working with the cabinet, the controls, the display, networking, or Batocera, I became more comfortable breaking problems into smaller pieces and verifying each part before moving on.
I also learned how important planning is when hardware and software have to work together inside a limited physical space. Component size, cable length, accessibility, airflow, display dimensions, and control placement all affected the final result. Decisions that seemed small at first often had a larger impact once everything was assembled.
On the software side, I gained a better understanding of Raspberry Pi systems, emulation, BIOS requirements, network file transfers, metadata management, interface customization, and performance troubleshooting. I also learned that automation can save a significant amount of time; discovering Batocera’s automated artwork scraping after doing much of the work manually was a good example of why it is worth looking for a more efficient process before repeating the same task hundreds of times.
Most importantly, the project reinforced how much I enjoy hands-on troubleshooting and building complete systems. I liked being able to move between physical construction, hardware, software configuration, networking, and testing, and then see all of those pieces come together into something that could actually be used and enjoyed.
Future Improvements
TBD.